If it’s not written down, forget about it.
Having essentially two full time jobs means that I must stay organized. Between meetings, deadlines, running errands, and well, having a personal life, there is just too much going on to be able to keep track of every mental note. As much as I rely on my phone’s calendar to keep me in check, I find writing things down on a Post-it® sticky note helps me tremendously. Perhaps its the same theory behind taking notes in a meeting or making to-do lists. The act of writing and crossing off items creates a sense of accomplishment!
I’ve been thinking about setting up a message board where my husband and I can keep track of our errands and important to-dos for quite some time now, and when I discovered these genius Post-it® Super Sticky Dry Erase Surface Sheets, I came up with the perfect solution.
Keep reading for my full tutorial on creating a DIY Removable Dry Erase Weekly Planner!
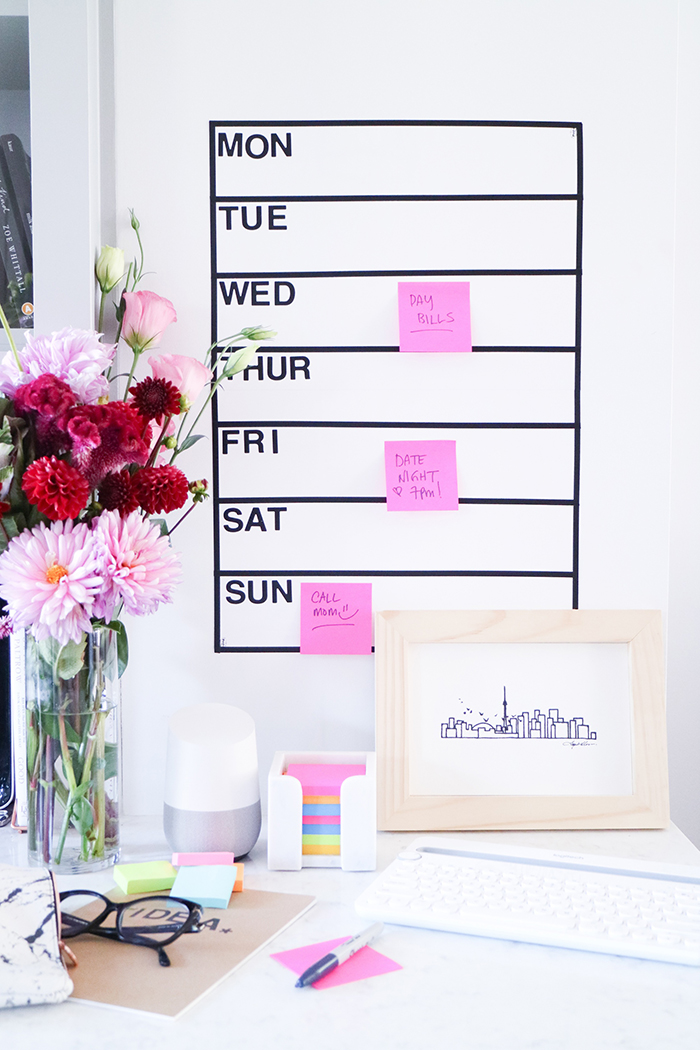
These Post-it® Super Sticky Dry Erase Surface Sheet offers and instant whiteboard solution that is suitable for just about any surface. They are super sturdy and flexible and 100% removable. This DIY Weekly Planner is so convenient and can be used with dry erase markers or Post-it® Notes!
What You Will Need
- Two sheets of Post-it® Super Sticky Dry Erase Surface Sheet (15 sheets per package)
- Assorted Vinyl Self Stick Letters (I used 1″ stickers)
- One roll of black vinyl tape
Prior to beginning, the wall/surface you are applying the dry erase sheets to should be clean, smooth, and dry. For optimal results, the surface you are working with should not contain loose paint, nail heads, nicks, gouges or other surface imperfections. If you want to ensure the best cleaned surface, wipe down with isopropyl rubbing alcohol (70%) and allow to dry for 10 minutes. In addition, if walls have been recently painted, allow paint to cure according to paint instructions before applying the Post-it® Dry Erase Surface.

Step One
If you’re applying this to a white wall surface, you may want to create a border by taping the 3 edges of each sheet with black vinyl tape. Cut the excess and discard.

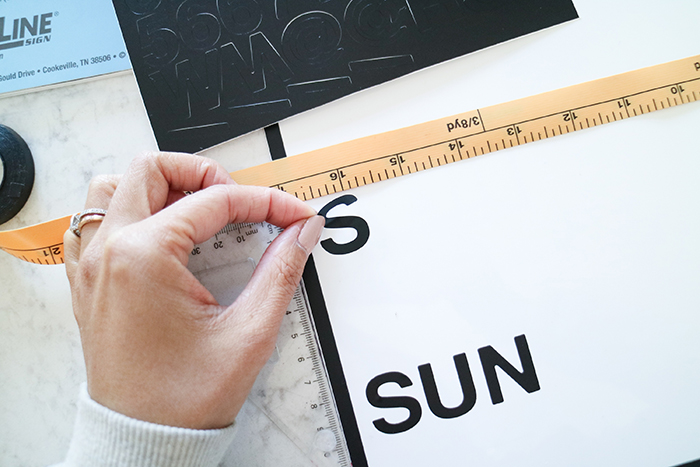
Step Two
Measure out each weekday’s dimensions across the sheets evenly and carefully apply each vinyl sticker. I started from the bottom edge using 1″ stickers, and left about 7.5 cm in between each set of letters.
Step Three
Repeat step above until you’ve competed both sheets.

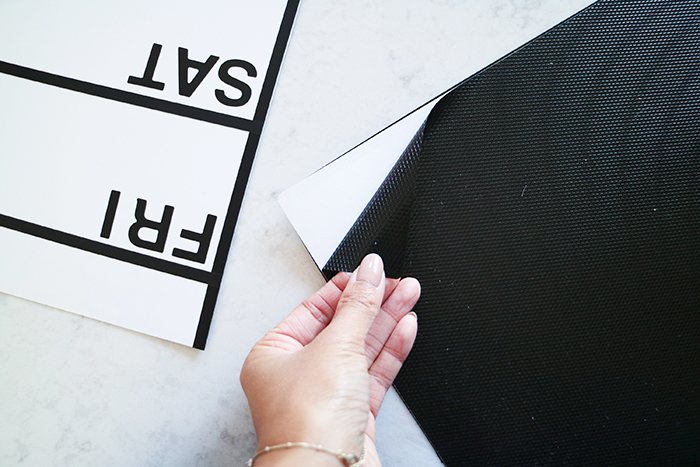
Step Four
Remove the backing from the first adhesive sheet.
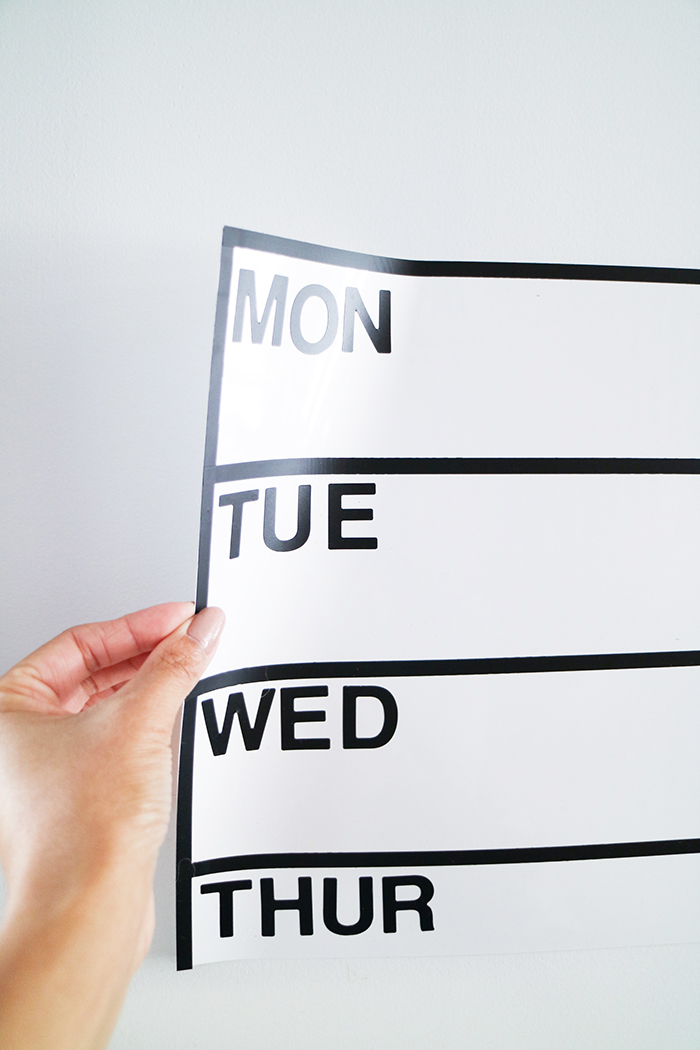
Step Five
Measure and apply to the wall surface as desired. Repeat step four and five with the second sheet.
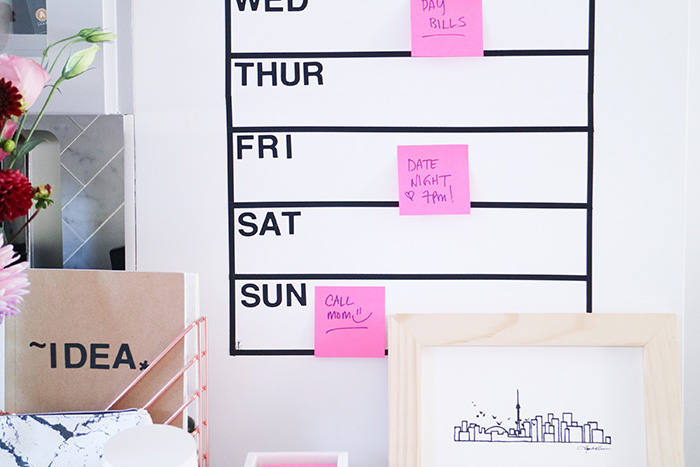

I absolutely adore the final results of this weekly planner and the use for Post-it® Super Sticky Dry Erase Surface Sheets are endless! This tutorial can be adapted to apply to any flat working surface, such as a desk or even a smaller version on a binder/notepad!
What do you do to stay organized?!
Be sure to visit the Inspiration that Sticks blog for more creative ideas from Post-it®!
Disclaimer: I am proud to be a 3M sponsored blogger, and as part of my responsibilities, I get the opportunity to evaluate 3M products.
1 comment
Awesome idea! It’s always good to keep track of all the tasks so we don’t forget anything important, thanks for sharing this. I’ll sure be using it!