My Little Secrets
  • DIY
    • Fashion
    • Home
    • Inspiration
  • Fashion
    • Outfits
    • Guides
  • Lifestyle
    • Beauty
    • Home & Decor
    • Food & Drink
    • Wedding
  • Mom Life
    • Pregnancy
    • Motherhood
  • About
    • Privacy Policy
    • Press and Features
  • DIY
    • Fashion
    • Home
    • Inspiration
  • Fashion
    • Outfits
    • Guides
  • Lifestyle
    • Beauty
    • Home & Decor
    • Food & Drink
    • Wedding
  • Mom Life
    • Pregnancy
    • Motherhood
  • About
    • Privacy Policy
    • Press and Features

My Little Secrets

A DIY and Lifestyle Blog

DIYFashion

DIY :: Rope Knot Headband

written by Natalie Ho 2013.04.08

Greetings from Arizona!! I’m hear for a work conference for a few days and can’t tell you how much I am enjoying the warm weather! I hope you had a wonderful weekend.

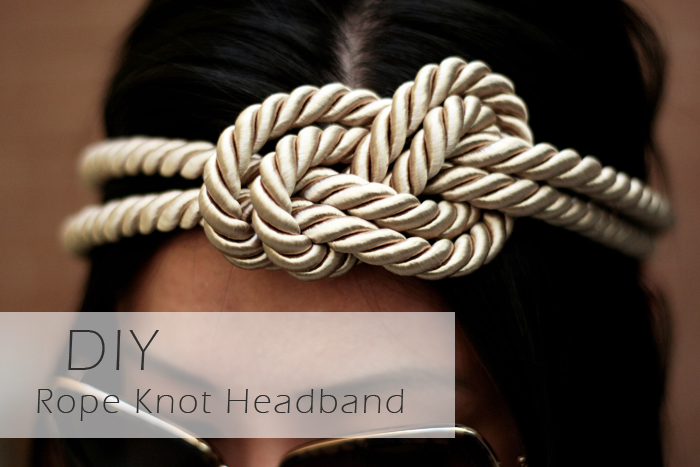
With Coachella just around the corner, I thought I’d share a DIY project – Rope Knot Headband – you might want to try whether you’re heading off to the music festival or for to add a little hippie vibe to your summer outfit.

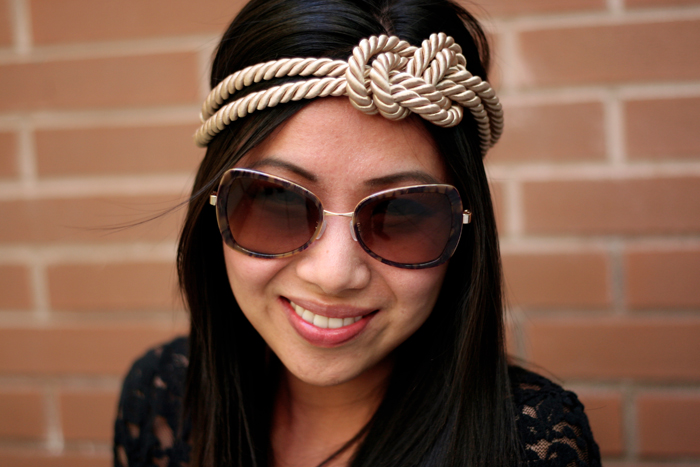
I’m not one that looks great with headbands, but I must say, this would looks so cute with some cut off denim shorts and a white crochet blouse!

DIY Rope Knot Headband, DIY coachella, what to wear to coachella


What you will need:
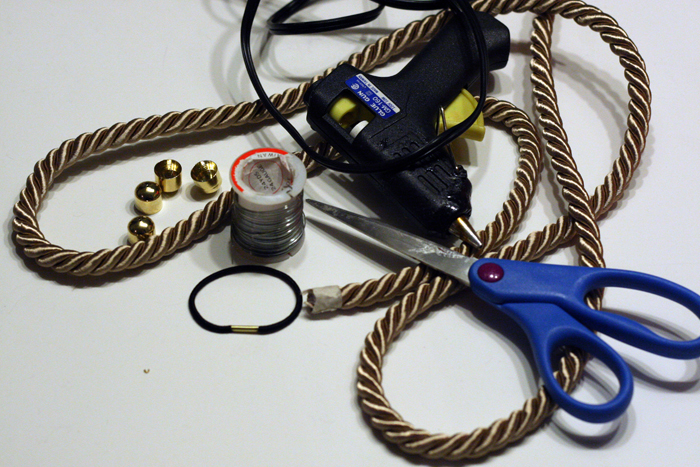
  • Rope (you can pick any diameter depending on your preference) – roughly 2 meters
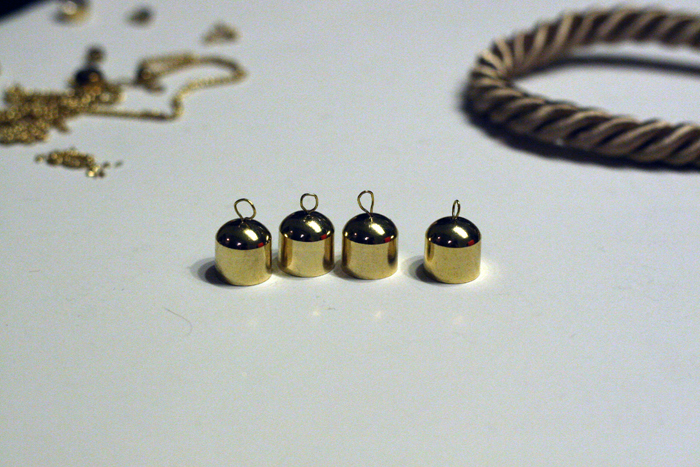
  • 4 rope end caps
  • 4 jump rings
  • An elastic band
  • Tape
  • Glue gun
  • Plyers
  • Scissors
  • Wire

DIY Rope Knot Headband, DIY coachella, what to wear to coachella

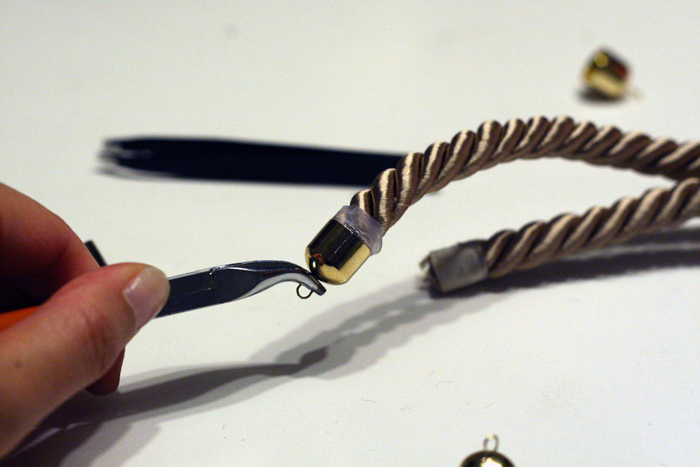
1. Start by prepping the rope end clasp. Cut a piece of wire and fold in half into a loop shape.

2. Take the ends of the wire and insert into the hole of the rope end clasp.


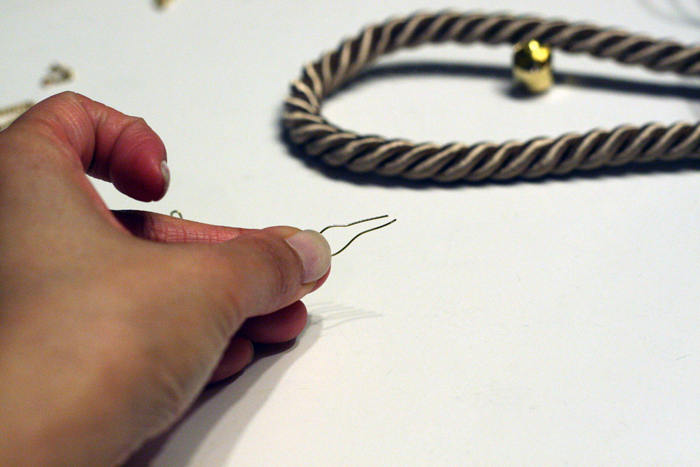
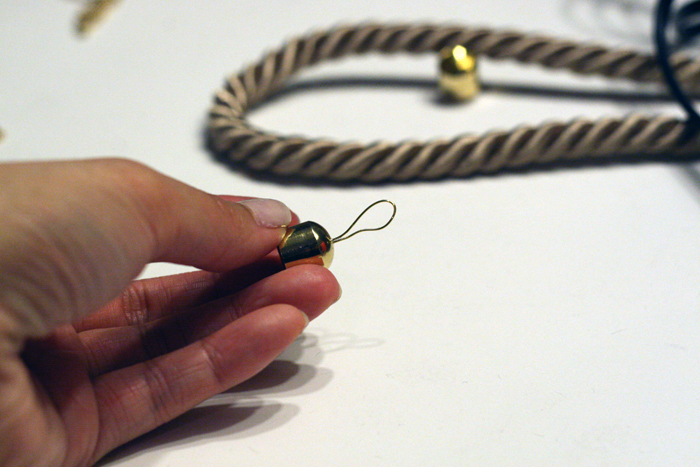
3. Repeat steps 1 and 2 three times to create the wire loops for all 4 end clasp. Set aside.

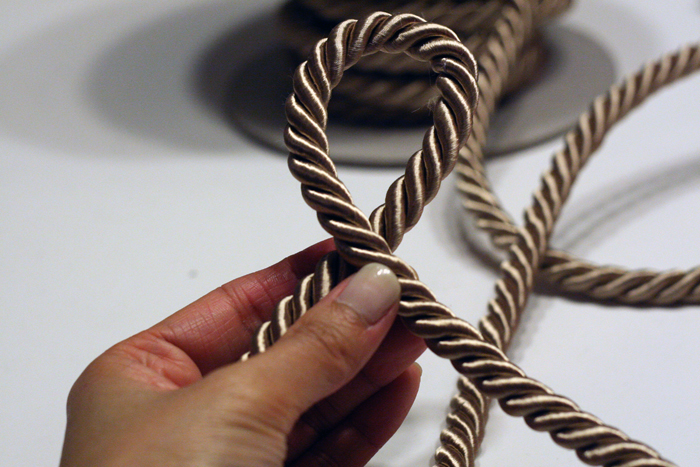
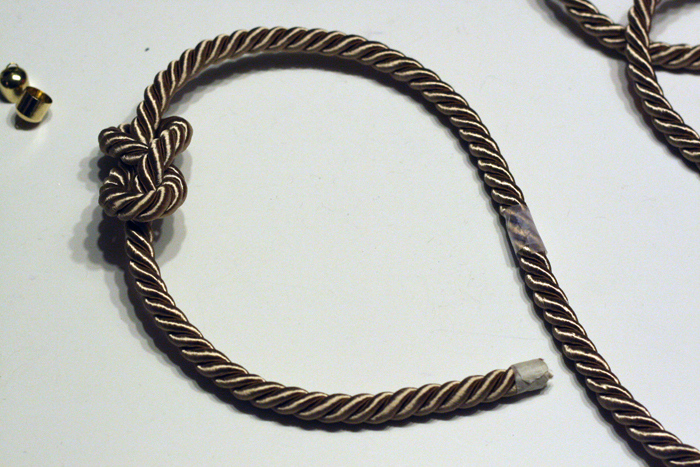
4. Take your rope, leaving about 8-10 inches of length on one end and create your knot, like a figure eight. Start the figure eight shape by first overlapping the rope as seen in the photo below.


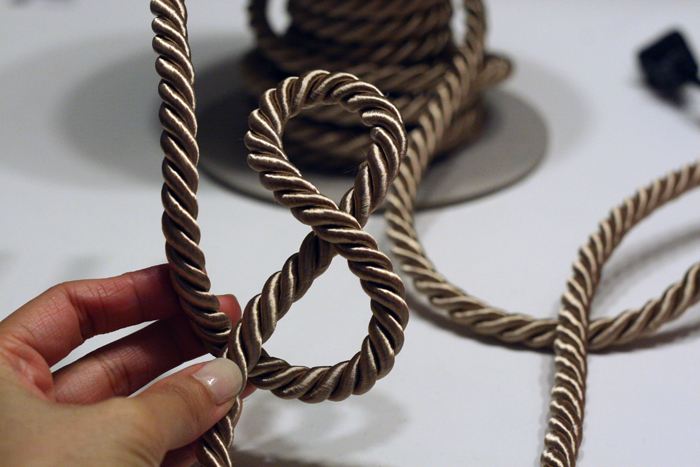
5. Continue the figure eight shape by tucking the rope underneath as shown below.

6. Take the end and loop it through back the top loop of the figure eight.


7. Pull gently and adjust the length of the two sides to ensure it wraps around the crown of your head.

8. Tape the end of the uncut side, and then cut the rope.

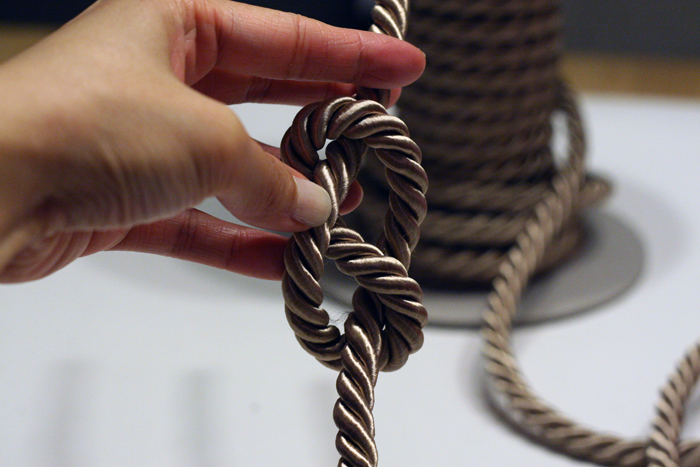
9. Repeat the same figure eight shape by first inserting the second strand of rope through one top half of the figute eight loop.


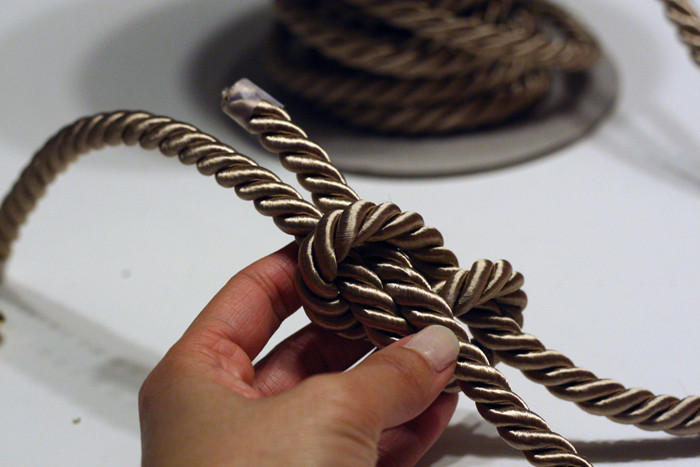
10. Pull the second strand of rope all the way through to match the first rope.

11. Continue to follow the figure eight shape with the second strand of rope.


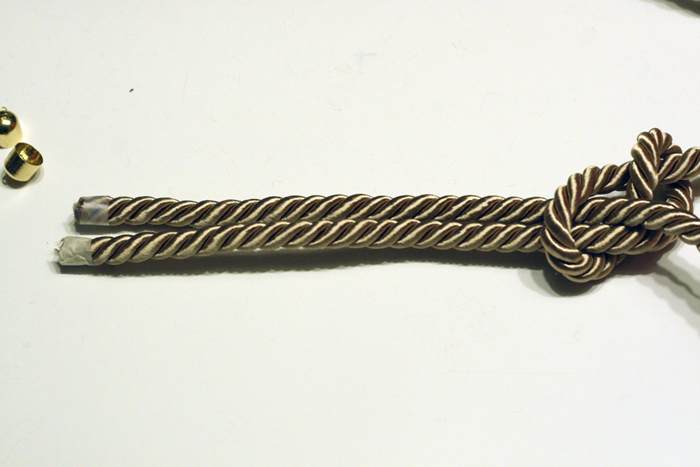
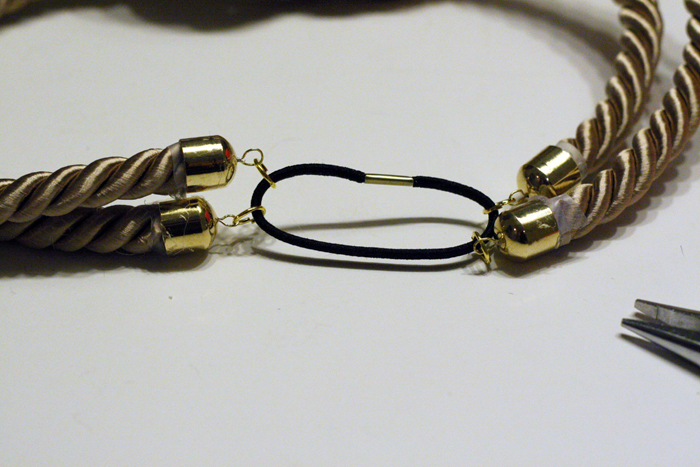
12. Once you have the two ropes in the figure eight knot and also have adjusted and trimmed the rope to length (matching the crown of your head), heat up the hot glue gun and squeeze glue into the inside of the end clasp and insert the end of rope, repeat for each one.

13. Attach a jump right to every end with the elastic band as shown below.


Here you have it! Final product!
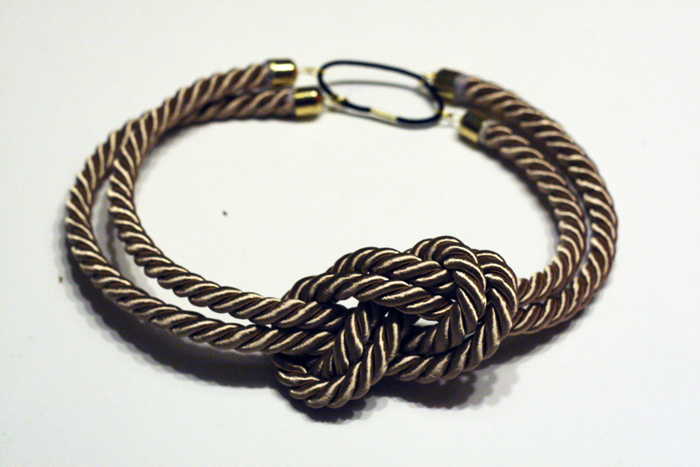
DIY Rope Knot Headband, DIY coachella, what to wear to coachella

Coachella ready!

DIY Rope Knot Headband, DIY coachella, what to wear to coachella

I hope you like this DIY project, click here to see more of my DIY projects.

I hope you have a wonderful start of your week!

Please share and pin if you like this DIY!

Connect with Me!
Facebook   Twitter   Pinterest   Instagram   Bloglovin’
3 comments
0
Facebook Twitter Google + Pinterest
Natalie Ho

Hi, I'm Natalie! Thanks for stopping by my DIY and Lifestyle blog. I hope you find many inspirations and ideas to elevate your daily life!

previous post
Lust List :: Daniel Wellington
next post
3 Simple Ways to Transform your LOVE for DIY into Something More

You may also like

DIY :: Large Canvas Art

2014.01.22

DIY :: Halloween Nail Art

2013.10.30

DIY :: Thrift Store Show Down {The Marilyn...

2014.06.04

DIY :: Wired Word Art Jewelry

2014.09.03

DIY :: Pastel Gold Foiled Easter Eggs &...

2017.03.21

DIY :: Sequin Anchor Sweater

2012.10.27

DIY :: Rope Crystal Earrings

2012.11.12

DIY :: Easy Holiday Beauty Gift Basket with...

2018.12.22

DIY :: Crystal Ear Cuff

2013.10.16

DIY :: Rose Beaded Necklace

2013.02.15

3 Simple Ways to Transform your LOVE for...

2013.04.09

DIY :: Gold Leaf Painted Pumpkins

2015.10.30

3 comments

aiyana 2014.01.11 - 11:30 am

Wow! this is such a cute, simple DIY thats so perfect!! i love love love it!!
xo, aiyanajane
http://www.citystylecountrysmile.com

Reply
Melany 2014.01.11 - 11:31 am

So beautiful!

http://www.mariacroqueta.blogspot.com.ar

Reply
truebluemeandyou 2014.01.11 - 11:32 am

I love how easy this is to make and I love DIYs with decorative knots and so do my readers. I posted two finished photos of your headband and a link back to you on my Tumblr blog truebluemeandyou. It’s now featured on the Tumblr DIY tag.

Reply

Leave a Comment Cancel Reply

This site uses Akismet to reduce spam. Learn how your comment data is processed.

Search

Connect

Facebook Twitter Instagram Pinterest Email

About Me

About Me

Hi, I'm Natalie!

Thanks for stopping by my DIY and Lifestyle blog. I hope you find many inspirations and ideas to elevate your daily life!

Subscribe

On Pinterest

@mlsecrets

Recent Posts

  • Motherhood: Easy and Educational Toddler Meal in Minutes with Chef Boyardee ABC 123

    2021.12.30
  • Home & Decor :: 4 Easy Halloween Home Decorations with your Cricut

    2021.10.28
  • Motherhood: Best Toddler Books Under $20

    2021.04.16
  • Home & Decor :: Before & After – A Living Room Transformation with Urban Barn

    2021.04.01
  • Motherhood: Must-Haves to Combat Toddler Cold and Flu Season

    2021.01.28
Close

PSST, Hey There!

Subscribe and receive all of my little secrets in your inbox.

Latest posts on Instagram

No images found!
Try some other hashtag or username
  • Facebook
  • Twitter
  • Instagram
  • Pinterest
  • Email
Footer Logo

Copyright © my little secrets


Back To Top