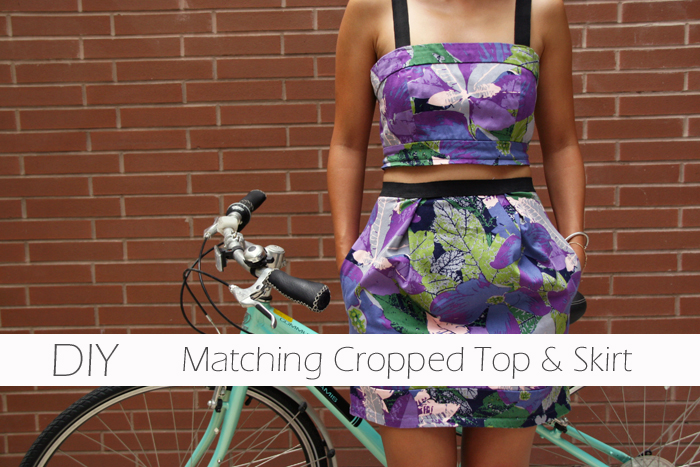
Back in June I shared a DIY Inspiration post on Matching Print on Print. I have been longing to pick one up at the store, but lucky for me while cleaning my closet for the big move (I swear, it’s like shopping in my own closet) I came across an old floral tube dress I purchased years ago at Urban Planet. The dress was a little wee tight for me across the chest and to be honest, I’m generally just not a huge fan of tube tops and dresses. My DIY sensors were turned on and I had the perfect plan to transform my tube dress into a two piece matching cropped top and skirt.
You will need a sewing machine for this refashion project, but there are a whole lot of options with this technique – you can essentially transform any existing dress you have into a two piece number.
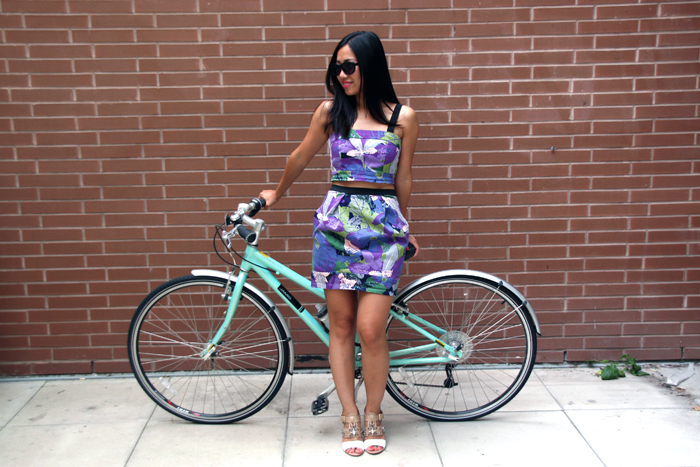
The results were great and I can’t wait to wear it again!
- A one piece dress
- Scissors
- Seam cutter
- Sewing machine
- Black wide ban elastic strap (enough to go around your waist and create straps for your top)

1. My dress had a zipper in the back, therefore the first step was to remove the zipper from the top part of the dress. I wanted to keep the zipper at the skirt.
2. Once the zipper was removed from the top portion, I then removed the top from the skirt part with a seam cutter.
NOTE: the dress you choose to use may not have the same form as mine, you may end up only needing to cut the dress into two pieces if it doesn’t have zippers nor seams.
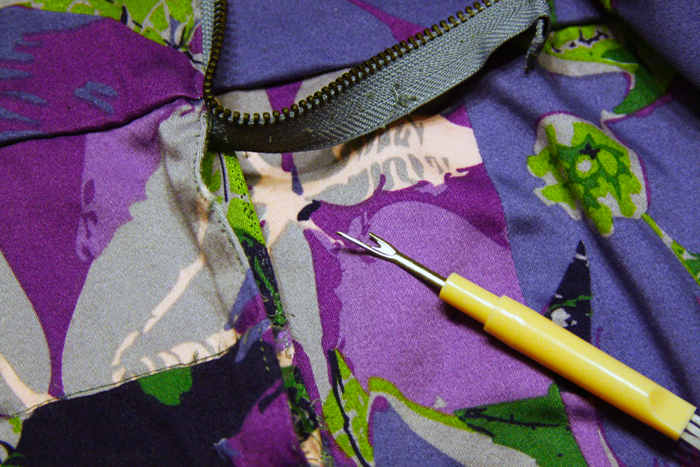
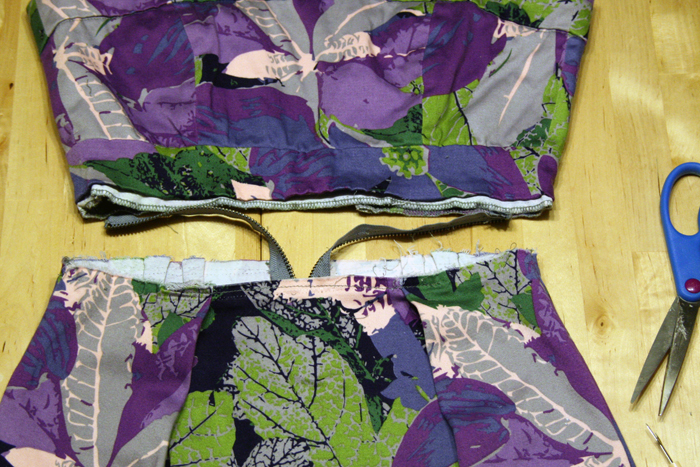
3. Once the two pieces were created, I trimmed the excess zipper from the skirt portion.
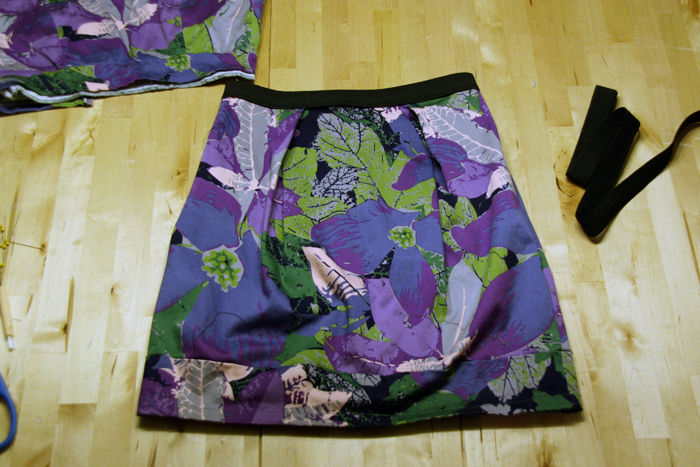
4. Placing the skirt flat and even on the working surface, I measured the length of elastic ban needed and pinned across the edge of the skirt to cover the raw edges of the skirt.
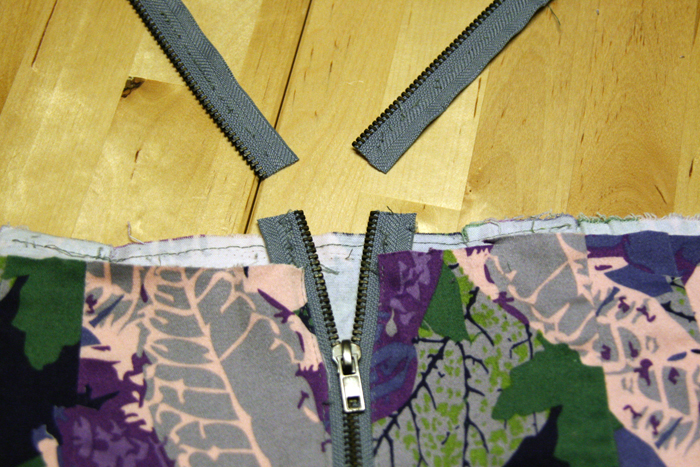
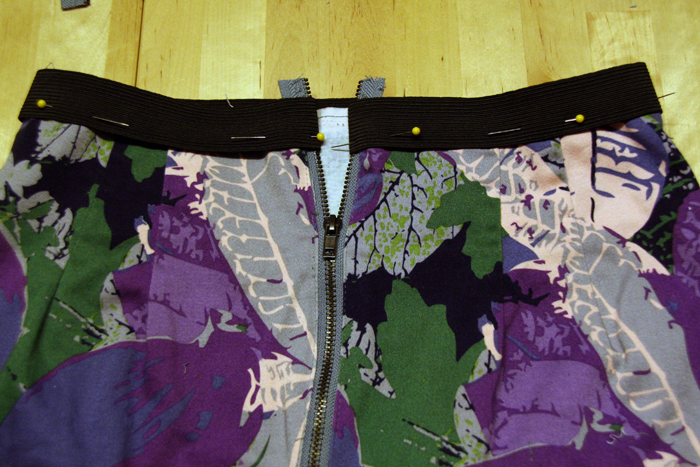
5. Since I decided to reuse the zipper, the end of the zipper had a raw edge. To prevent the zipper clasp from slipping off the zipper, I made sure the elastic ban was also wrapped around the zipper as shown in the photo. Pin the edges in.
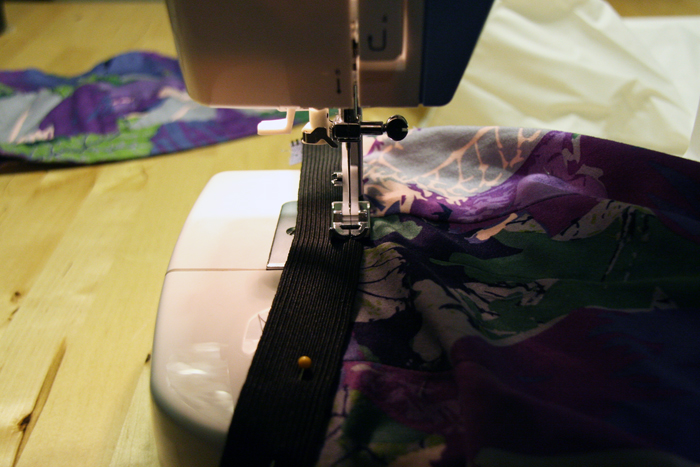
6. Sew the ban onto the skirt using a sewing machine. I used a simple straight seam. (I’m still learning how to sew!)
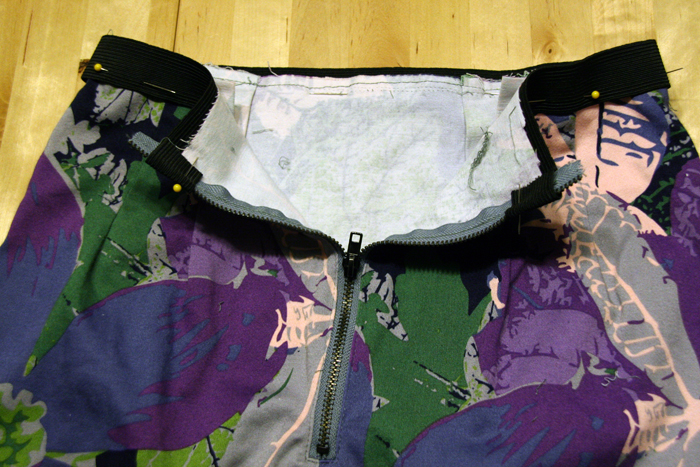
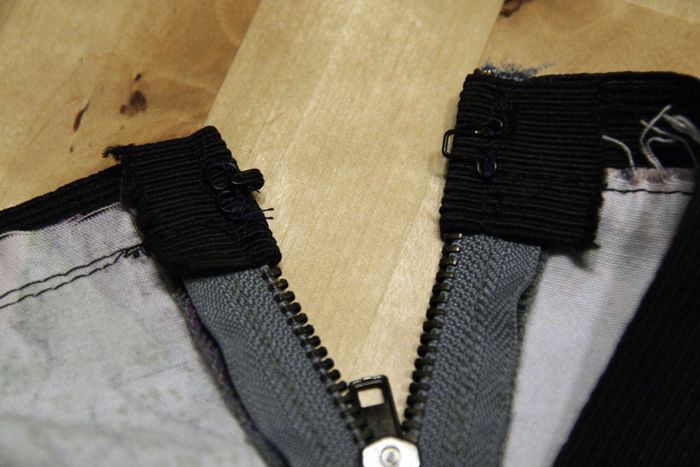
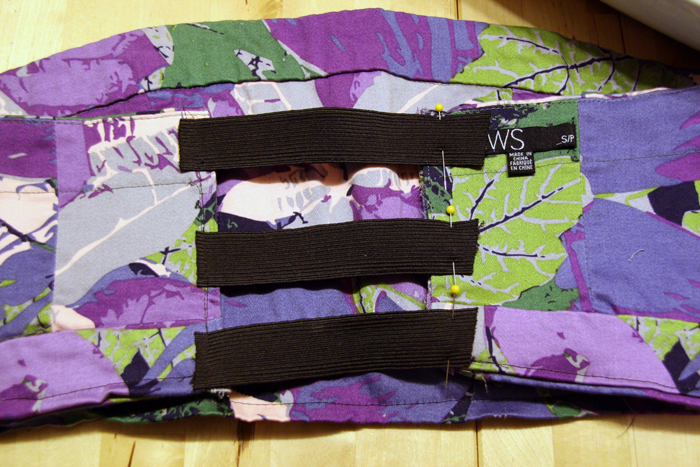
7. Since the zipper didn’t reach the top edge of the skirt, I attached a fixture to make sure the skirt will stay up while its on.
8. Set aside the skirt and move on to working on the top.
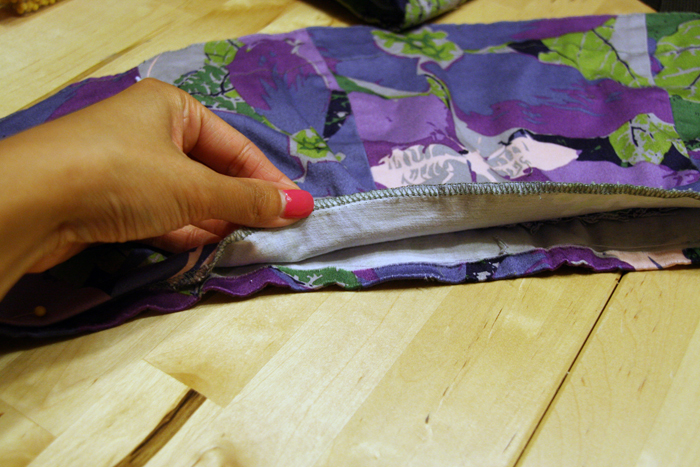
9. Pin the raw bottom edges of the top with pins.
10. Using the same settings, sew the bottom edges together using a sewing machine.
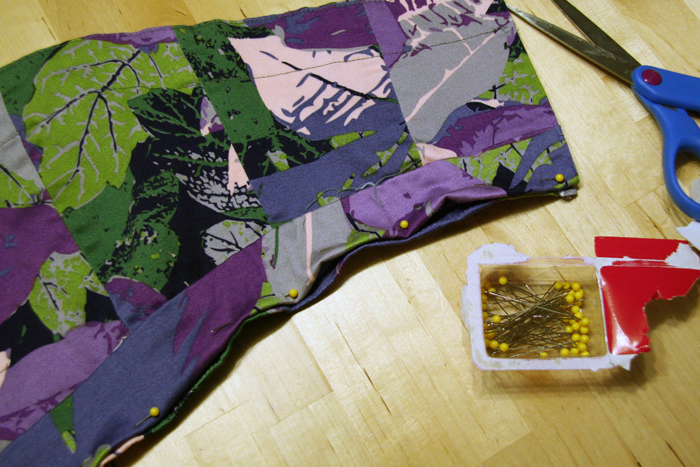
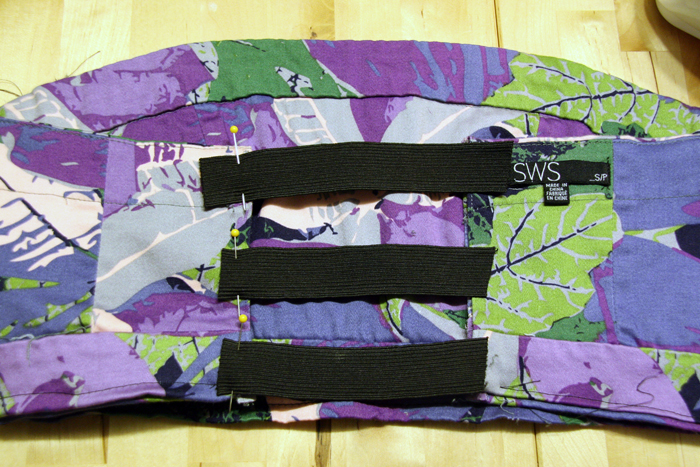
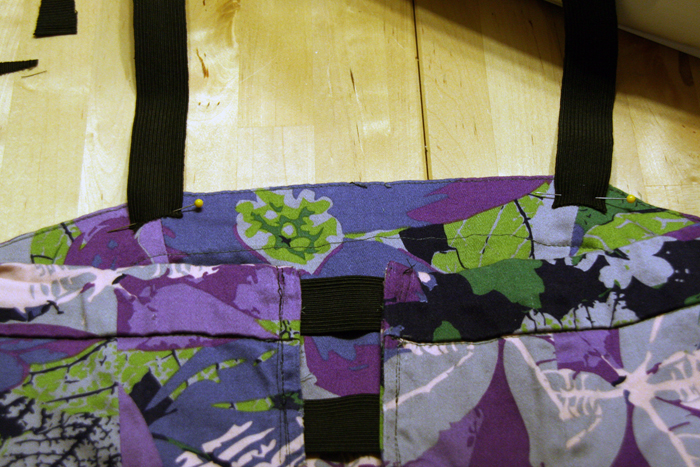
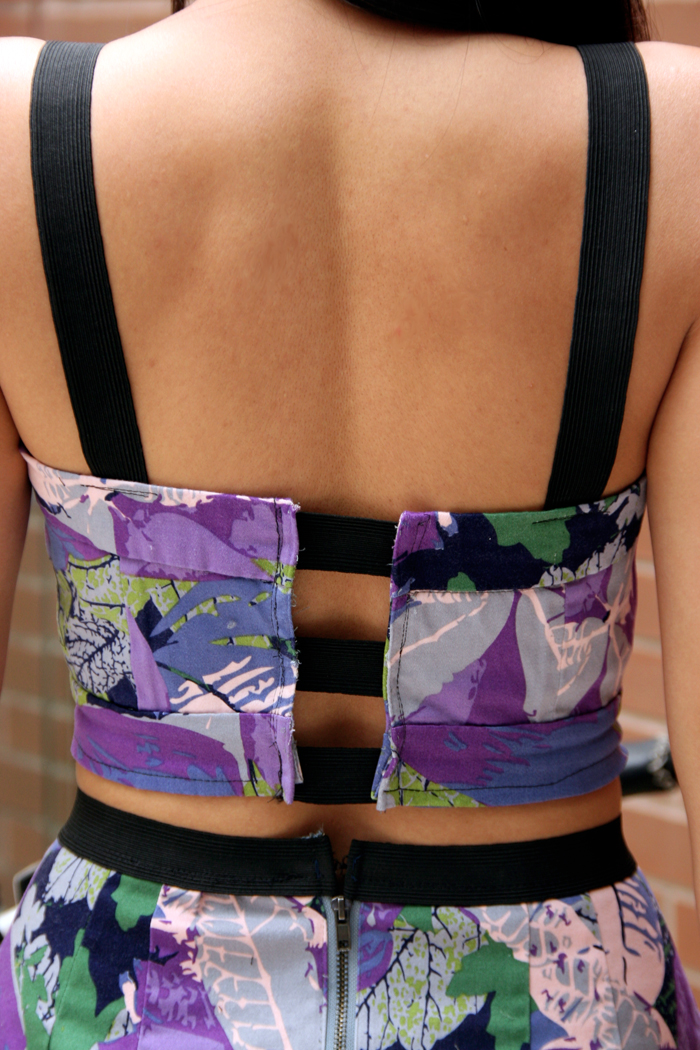
11. As mentioned earlier, my dress was a bit tight around the chest, therefore I decided to create an elastic strapped back to make the top bigger and easier to slip on since the straps are stretchy. Flip your top inside out, measure and cut the length of each strap. Pin one side first and sew them onto the top.
12. Once one side has been sewn on, pin the other side evenly and sew them onto the top.
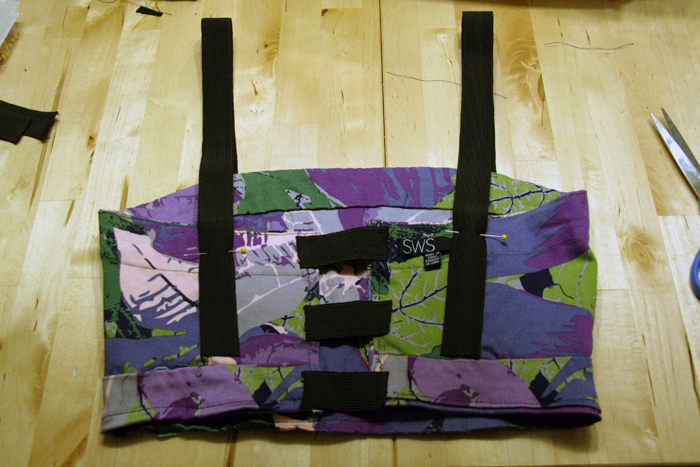
13. Cut two equal straps and pin each to the front edge of the top creating the two shoulder straps. Sew the two edges with a sewing machine.
14. Measure evenly and pin the two straps on the back edge and sew using a sewing machine.
NOTE: I made a boo boo the first time around and made my straps too long, so I actually had to cut them shorter and resew them. So make sure you measure properly, but having longer is always better than too short!
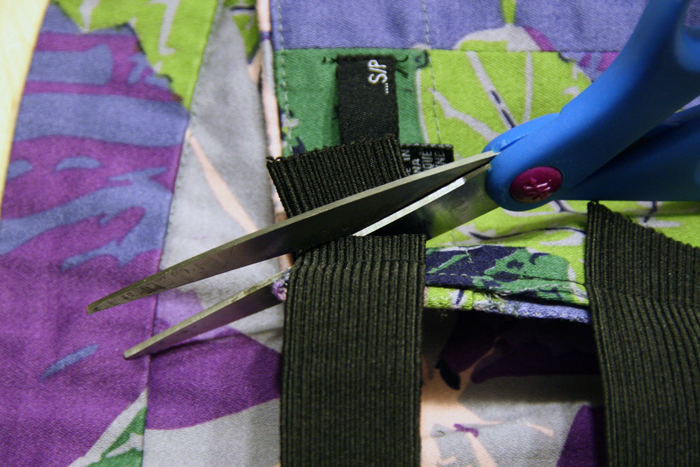
15. Last step is the trim the excess from the elastic straps. Turn the top inside and it’s ready to wear!
Isn’t it super cute?! I am already tempted to create my next matching set – thinking of working on a chiffon piece, thoughts?!
As you can see, my sewing job isn’t superb yet, but I’ve improved quite a bit. Any sewing machine tips you have to share is much appreciated!

Thanks for stopping by this DIY refashion project! I’m also glad you got to meet my bike – Mint! I got her last year and I can’t wait until I take her for more strolls this summer. Oh and if you’re wondering where my killer heels are by Sam Edelman, buy them here (the heels are actually translucent!).
If you like my project please share it with your friends! I’d really appreciate it, thank you! Have a great rest of your week!
6 comments
OMG this is beyond fabulous!!! I love how you added the black bands & now I’m racking through my brain trying to think of what dress I’m going to be cutting up 🙂
I love how you transformed you dress into a top and skirt! Would want to try this out! 🙂
Would you want us to follow each other on Instagram, Bloglovin’, and Twitter?
I followed you on Instagram #308 , Bloglovin’ #47, and Twitter #463
I liked you on Facebook #700
–
Pauchee Casimiro
Facebook Page: https://www.facebook.com/HerWorldOfRandomnessBlog
Twitter and Instagram: @paucheecasimiro
http://paucheecasimiro.blogspot.com/2013/07/giveaway-teaser-envelope-clutches-from.html
Hello love!
I found your amazing blog thanks to CityBlis! I love it! Newest follower!
This is such an amazing DIY project, you’re very talented! I love the pretty print! Who knew you could make an entirely new outfit with a dress! (check out http://www.diyrefashion.com I think this post will fit perfectly! follow me too!)
GREAT post! 🙂
xo KCN
Inside Look At KCN <3
That is such a great idea to revamp a sweet floral dress and add some edge 🙂 currently scouring my closet for something I can day hehe
This is GENIUS!! Going to have to break out my sewing machine for this one!
http://thefrugalouslife.com
I love what you did with the dress! I’ve also been looking around for DIYs so I can revamp my closet, and I love matching ensembles.
A little sewing tip: when you’re sewing items that stretch, it’s better to set your sewing machine to the zig-zag stitch.