My Little Secrets
  • DIY
    • Fashion
    • Home
    • Inspiration
  • Fashion
    • Outfits
    • Guides
  • Lifestyle
    • Beauty
    • Home & Decor
    • Food & Drink
    • Wedding
  • Mom Life
    • Pregnancy
    • Motherhood
  • About
    • Privacy Policy
    • Press and Features
  • DIY
    • Fashion
    • Home
    • Inspiration
  • Fashion
    • Outfits
    • Guides
  • Lifestyle
    • Beauty
    • Home & Decor
    • Food & Drink
    • Wedding
  • Mom Life
    • Pregnancy
    • Motherhood
  • About
    • Privacy Policy
    • Press and Features

My Little Secrets

A DIY and Lifestyle Blog

DIYFashionGift Guide

DIY {Holiday Gift Guide} :: Stackable Bracelet

written by Natalie Ho 2012.11.23

Happy Friday everyone! I hope your work day has gone by quickly today so that you can get an early kick start to your weekend. What do you have planned this weekend?

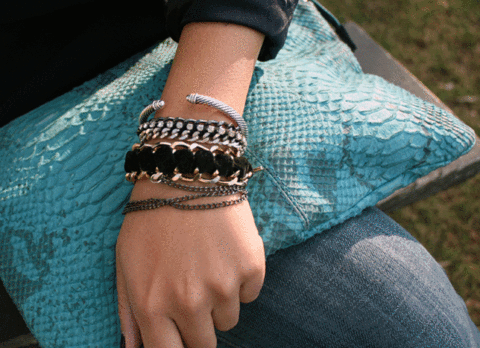
In my last DIY Holiday Gift Guide Post, I suggested giving a Statement Necklace as a holiday gift to that special friend. Today, what about considering a Stackable Bracelet as an option? I love stacking bracelets (with my watches too!). I’ve handpicked a few of my favourites below at different price points and also made a  DIY version for you try!

DIY Holiday Gift Guide: Stackable Chain Bracelet

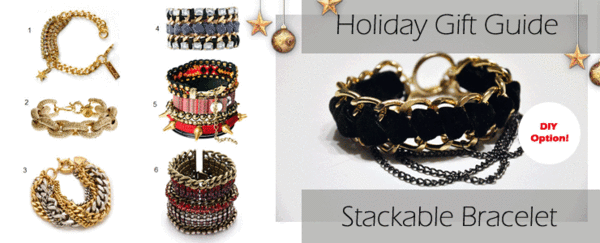
1. Lauren Elan Winter Collection Celeste Bracelet $85 2. J. Crew Classic Pave Link Bracelet $144 3. Giles and Brother Large Multi Chain Bracelet $150 4. Stella & Dot Tempest Bracelet $104  5. River Island Chunky Spike Friendship Bracelet $26.84 (additional 20% off by using promo code BLACKFRIDAYBONUS)  6. DANNIJO Tate Bracelet $434.30

Here are step by step DIY instructions for creating your own Stackable Bracelet.


What you will need:
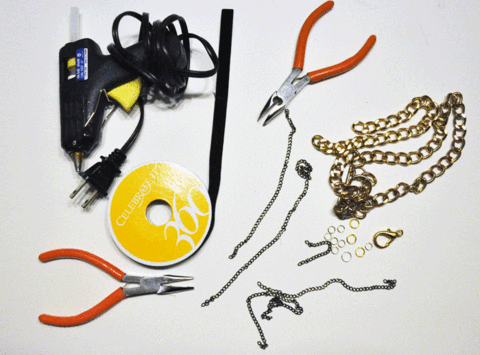
  • Gold Chain – pick something good in quality and has a bit of weight to it (especially if you’re gifting it!)
  • Velvet Ribbon – or anything similar
  • Lobster Clamp or any type of closure
  • Plyers
  • Jump Rings
  • Hot glue gun
  • Assorted thin strands of chain

Measure the length of chains you need for your bracelet and trim as appropriate. I have a smaller wrist size, so my chains were roughly 6 inches long. You will need to trim 2 of equal lengths. Do the same for your ribbon, however make it at least double the length of your chain.

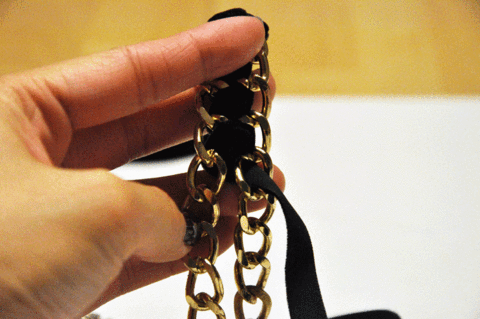
Tie the two ends of the chains together by looping the velvet ribbon and making a flat knot. Take the longer section of your ribbon and insert the end through the first link of the opposite chain, wrap around and repeat.


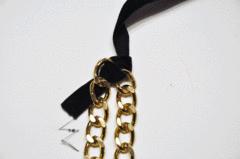
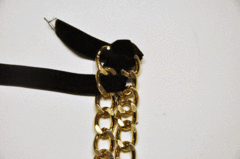
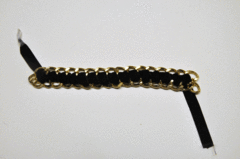
Hold your chains up as you continue your way down, it should start looking like the image below. As you continue your way, make sure your two chains are lined up in parallel, i.e. the chain links are adjacent to each other, this will ensure your bracelet is even and flat on your wrist.

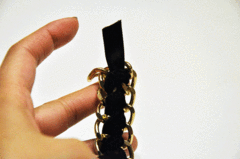
When you’ve completed to the end of the chains, once again, tie a knot to the last links of the chains with your ribbon. Leave about 1/2-1 inch of ribbon trim.


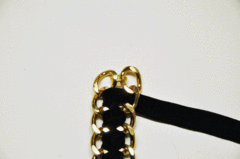
Connect the two last links of each end of the chains with a jump ring. This will secure the two chains. Apply a dab of hot glue to the inside of the end trim of your ribbon and fold it down and secure to the back of the bracelet. Repeat this for both sides.


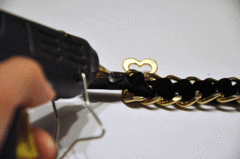
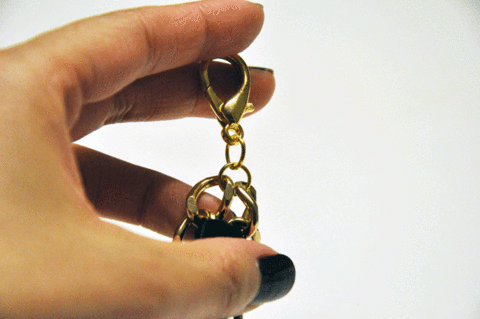
Attach your closures to the ends of your bracelet.

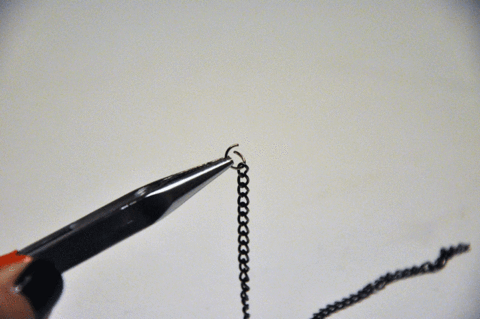
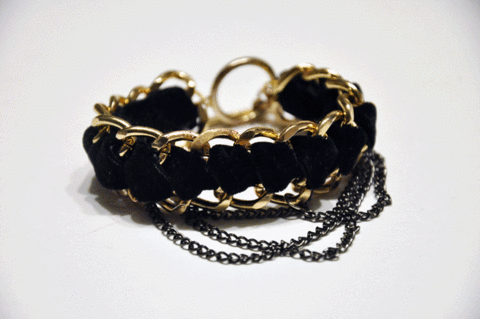
At this point, you pretty much have a simple chain woven bracelet! I decided to go an extra step. I attached thinner strands of chain to my bracelet to give it a more spunky look.

Here you have it. Feel free to attach beads or crystals to your bracelet to suit your style.

DIY Chain Bracelet

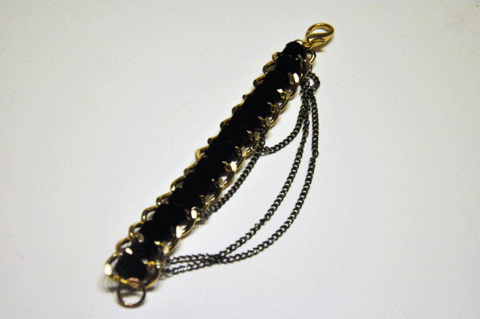
Voila! The final product!

DIY Chain Bracelet

DIY Chain Woven Bracelet

Thanks for reading and have a great weekend!

Connect with Me!
Facebook   Twitter   Pinterest   Instagram   Bloglovin
Christmas
0 comment
0
Facebook Twitter Google + Pinterest
Natalie Ho

Hi, I'm Natalie! Thanks for stopping by my DIY and Lifestyle blog. I hope you find many inspirations and ideas to elevate your daily life!

previous post
DIY {Holiday Gift Guide} :: Statement Necklace
next post
Style Eh? Moon Apparel

You may also like

DIY :: 10+ [FREE] Tools for DIY Graphic...

2014.09.23

DIY Inspiration :: Vintage Gold Buttons

2013.02.18

DIY :: Wedding Terrarium Favors

2015.11.17

DIY :: Rope Knot Headband

2013.04.08

Lifestyle :: Creating “Sticky” Memories with Scotch Tapes

2017.05.31

DIY (and giveaway) :: Outdoor Planter {with President’s...

2014.06.06

DIY :: Reusable Table Setting Placemats

2014.12.23

DIY :: I Wear My Heart on My...

2013.01.27

Lifestyle :: Spring & Summer Gardening Plans

2016.05.17

Holiday :: Family Gifting with Photobox

2015.12.07

DIY :: Pom Pom Coasters and {Henry’s Hard...

2018.06.08

DIY :: Dry Erase Acrylic Photo Cards &...

2015.02.12

Leave a Comment Cancel Reply

This site uses Akismet to reduce spam. Learn how your comment data is processed.

Search

Connect

Facebook Twitter Instagram Pinterest Email

About Me

About Me

Hi, I'm Natalie!

Thanks for stopping by my DIY and Lifestyle blog. I hope you find many inspirations and ideas to elevate your daily life!

Subscribe

On Pinterest

@mlsecrets

Recent Posts

  • Motherhood: Easy and Educational Toddler Meal in Minutes with Chef Boyardee ABC 123

    2021.12.30
  • Home & Decor :: 4 Easy Halloween Home Decorations with your Cricut

    2021.10.28
  • Motherhood: Best Toddler Books Under $20

    2021.04.16
  • Home & Decor :: Before & After – A Living Room Transformation with Urban Barn

    2021.04.01
  • Motherhood: Must-Haves to Combat Toddler Cold and Flu Season

    2021.01.28
Close

PSST, Hey There!

Subscribe and receive all of my little secrets in your inbox.

Latest posts on Instagram

No images found!
Try some other hashtag or username
  • Facebook
  • Twitter
  • Instagram
  • Pinterest
  • Email
Footer Logo

Copyright © my little secrets


Back To Top