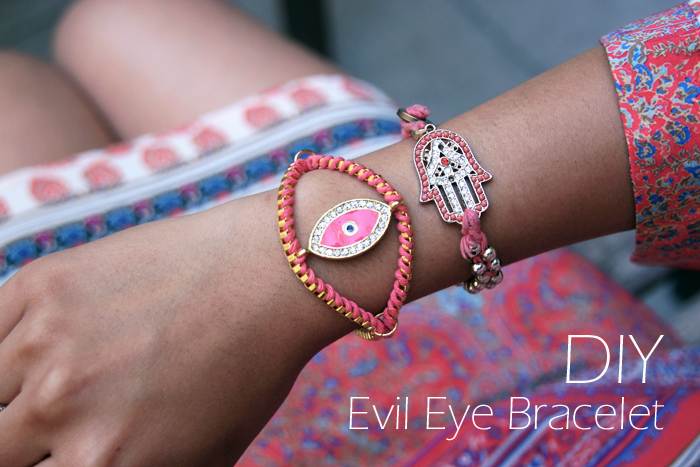
Happy Friday lovelies! I am so happy to share this DIY Evil Eye Bracelet with you. It turned out fantastically and I’ve been wearing it everyday since I worked on it. This was so easy to do, inspired by a photo I saw on Instagram the other night. Since I made this, I started obsessing over Evil Eye jewelry and found this Evil Eye Ring Bracelet, how cute is that?!
If you can’t find the middle “eye” charm, feel free to use a circular shaped crystal charm to create the “eyeball”. It will have the same effect.
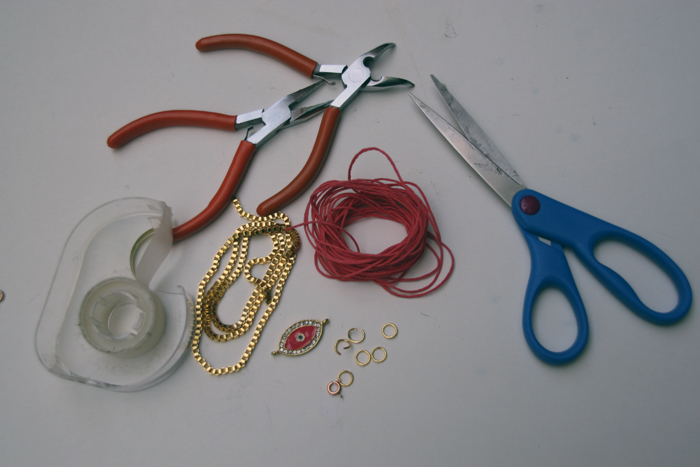
- minimum one meter of knotting cord
- squared link gold chain
- scissors
- pliers
- jump rings
- a closure
- evil eye charm (find from local jewelry supplies store or Etsy and Ebay)
- tape
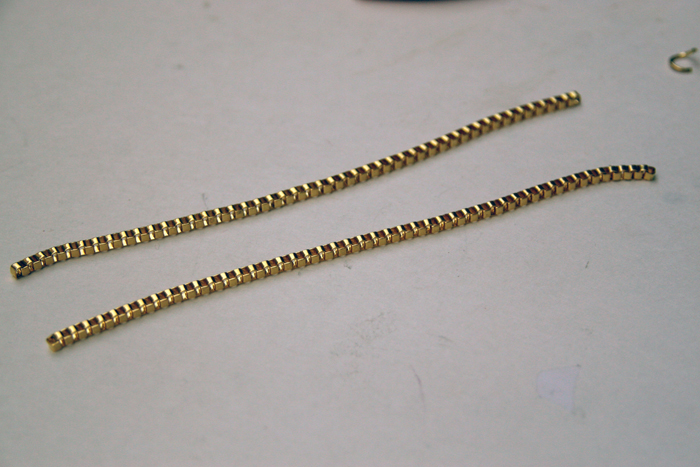
1. Measure the length of bracelet you want and cut two equal pieces of gold chain.
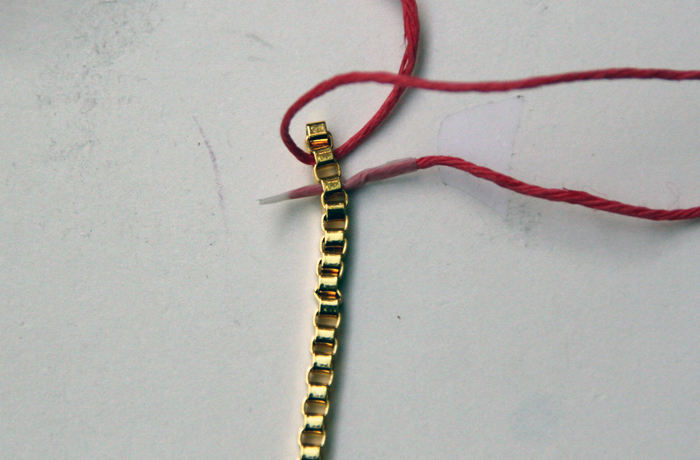
2. Start by taping down one end of the knotting cord (this will help with weaving the cord through the chain links without the cord fraying) and insert through the top end of the chain.

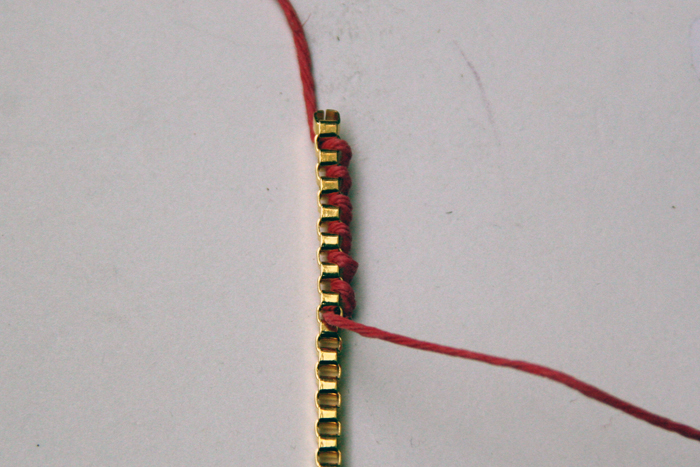
3. Pull the knotting cord through from right to left to a desired length so that you have enough slack to string through the rest of the chain.
4. Take the end of the knotting cord (the end with the tape edge), go over from this time top left to right wrapping the knotting cord around the chain and insert the end through the next link down.
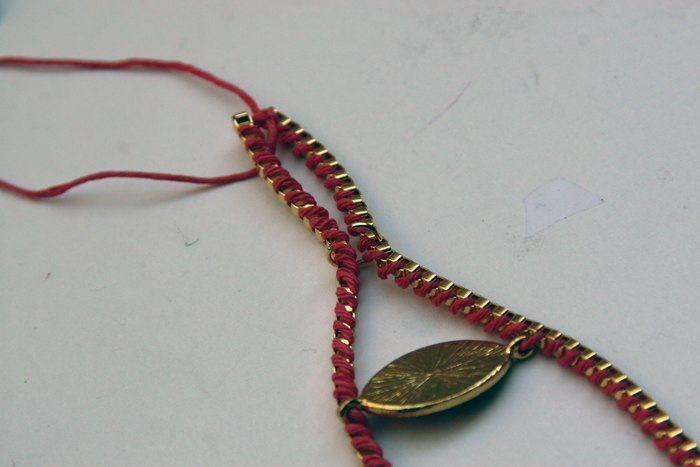
5. From the image on the bottom left, you will see the wrap woven pattern you are creating. Continue doing this until you reach the mid point on the chain (count the links to ensure you are even).
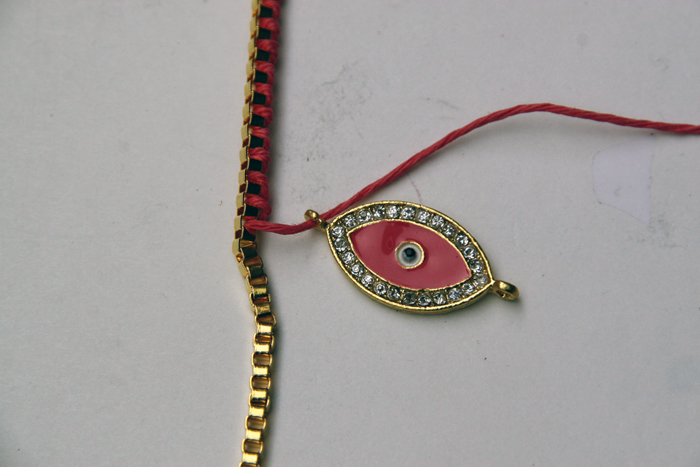
6. Once you’ve reach the mid point, loop the knotting cord through the charm and working the same way as you have, w
eave the knotting cord to the next link by wrapping it from right to left and through.
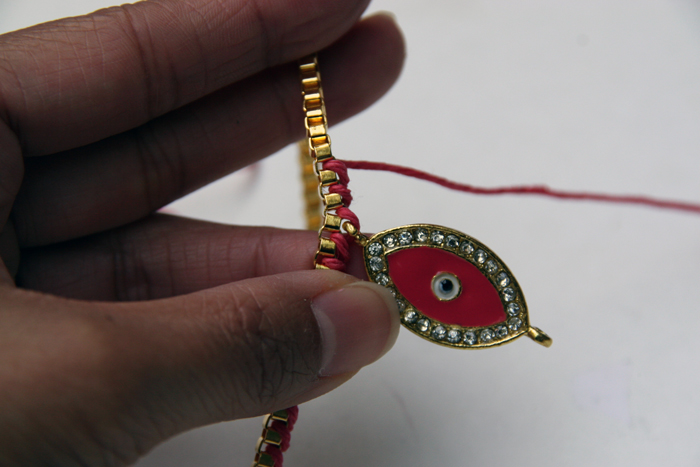
7. Continue wrapping the knotting cord around the chain until you reach the end from the mid-point.
8. Repeat the same steps above on the next chain. This time you are securing the two chain together via the charm.

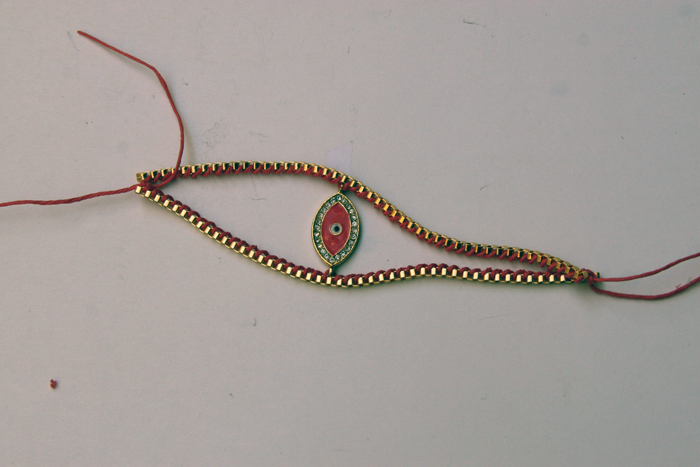
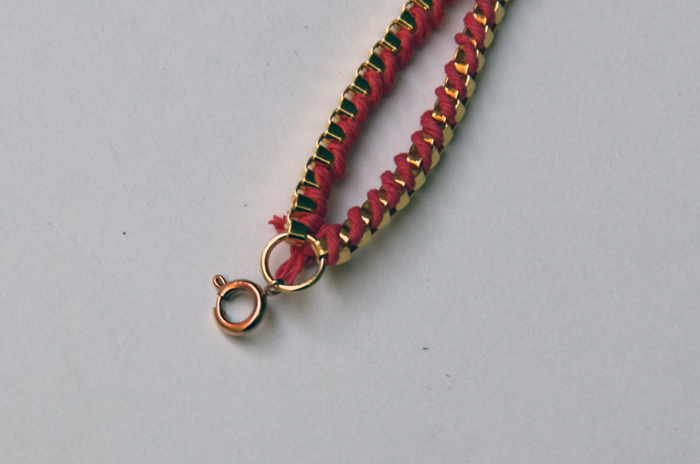
9. Once you’ve completed both sides, tie the ends of the knotting cords together several times.
10. Using a jump ring and pliers, attach the two chains together at the mid-point between the charm and the tied end.
11. Snip the excess knotting cord off both ends.
12. Attach the chain ends by securing one end with a closure and the other end with a jump ring.
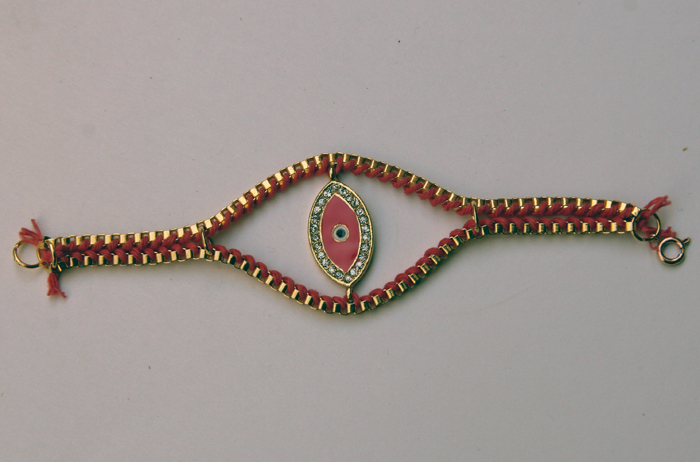
Here you have it! Perfect for summer accessorizing and to ward off the “evil eye”! 🙂
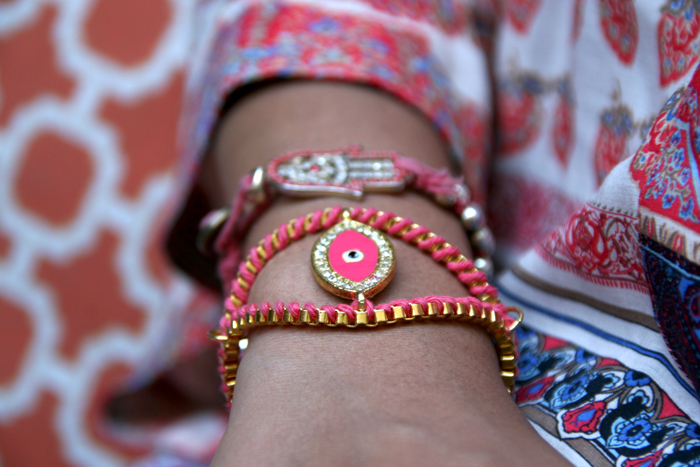

Wearing: Zara Tunic, DIY Hamsa Hand Bracelet (I used this technique) and DIY Evil Eye Bracelet
PLEASE try your own version and share it with me!
Please comment and share if you like this!
On a side note, I had the pleasure of speaking at GLAM‘s Social Content Masterclass #GlamMasterclass with three other fabulous bloggers yesterday at the Soho House in Toronto. Thank you so much for everyone who came.
Please check out the other lovely speakers – BeautyRSVP, FAJO Magazine, Everything Beautiful
14 comments
This is fantastic! Thanks for sharing.
http://www.eurekacrystalbeads.com
Hey, this is really amazing.
May I ask where you got those evil eyes from ??
Thank you !
xx
Thanks so much for checking out this project! I purchased the evil eye charm from a local craft/jewelry supplies store. They carry lots of jewelry findings. I also like this site – http://www.mjtrim.com/, they ship worldwide.
Look luck and happy crafting!
xo
Natalie
[…] Learn it here http://www.mylittlesecrets.ca […]
This is great!!!
See my version of DIY Evil Eye Jewelry here: http://lilasirena.blogspot.mx/2013/05/diy-evil-eye-jewelry.html and tell me what you think!
Thank you =)
Lila&Sirena
Excellent idea! I’ll try it! Thank you so much for sharing!
[…] See the tutorial here. […]
[…] See the tutorial here. […]
[…] See the tutorial here. […]
[…] See the tutorial here. […]
This bracelet is amazing. Creative diy idea you have. Can’t wait to make one for my mom. Thanks for sharing.
[…] Eye Bracelet via […]
[…] Image Courtesy of & DIY Tutorial by My Little Secrets […]
[…] See the tutorial here. […]