My Little Secrets
  • DIY
    • Fashion
    • Home
    • Inspiration
  • Fashion
    • Outfits
    • Guides
  • Lifestyle
    • Beauty
    • Home & Decor
    • Food & Drink
    • Wedding
  • Mom Life
    • Pregnancy
    • Motherhood
  • About
    • Privacy Policy
    • Press and Features
  • DIY
    • Fashion
    • Home
    • Inspiration
  • Fashion
    • Outfits
    • Guides
  • Lifestyle
    • Beauty
    • Home & Decor
    • Food & Drink
    • Wedding
  • Mom Life
    • Pregnancy
    • Motherhood
  • About
    • Privacy Policy
    • Press and Features

My Little Secrets

A DIY and Lifestyle Blog

DIYFashion

DIY :: Rope Crystal Earrings

written by Natalie Ho 2012.11.12

I am absolutely in love with Shourouk’s Jewelry Collection, it is to die for. I adore the use of large Swarovski crystal pieces, coupled with chains and ropes to create the best balance of playful, vintage, yet contemporary looks. My favourite masterpieces include this, this, and this. So I decided to try my own pair of rope crystal earrings. Let me know what you think.

DIY Rope Crystal Earrings


What you will need:
  • 1/4 inch Rope (I bought mine from Fabric Land, it was $3.00 for a meter)
  • Small Plyers
  • Jump Rings
  • Jewelry Metal Caps
  • Thin Wire (you can substitute with fish wire)
  • Scissors or something to cut your wire with
  • Tape
  • Chain (I bought mine from a jewelry supplies store, but you can use chain from old necklaces you already have!)
  • Crystal Finding (mine was a vintage bracelet I bought from the flea market and I cute it into even parts)
  • Earring hooks
  • Hot glue gun (sorry I didn’t include in pictures below!)
  • Large rhinestones (optional)
  • Jewel-it glue (optional)

DIY Rope Earrings

DIY Rope Earrings

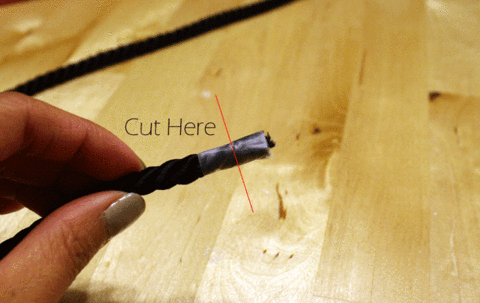
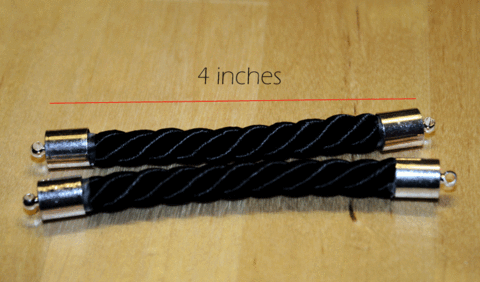
Start by taping down the ends of your rope tightly. These ropes tend to unravel if you don’t tape it down really tight. Once you’ve taped it down, cut the end off, leaving just about 1/2 an inch of taped end left. Repeat this step until you have 2 equal lengths of rope with both ends taped down. I made my two equal lengths 4 inches in length.

Heat up your glue gun and squirt some hot glue into the metal cap, about half way filled. I used a pair of pliers to hold onto the cap as the glue gets pretty hot. Then insert one end of the rope (with the tape on) into the cap, press down hard to ensure the end of the rope is pressed into the end of the cap. The glue to affix to the end of rope as well as the sides.

Repeat the above step for all ends of the 2 ropes and set aside. You may want to decrease or increase the length of your rope depending on your preference.

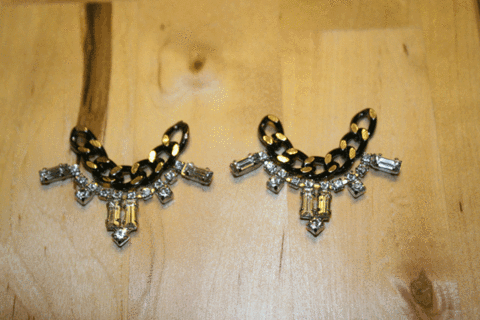
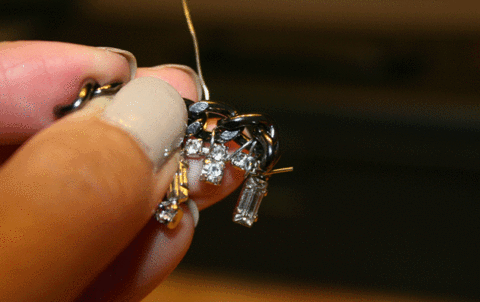
Now take your chain and crystal finding and secure them with a metal wire. I used pliers to help me loop and pull the wire through. Adjust as you continue to process to make sure you haven’t tied them too tightly together. I will also suggest using fish wire if you don’t want the exposed wire look.

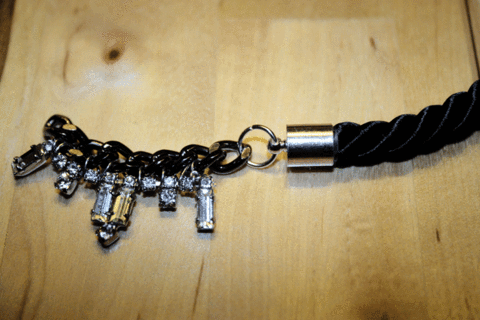
Now connect one end of the rope with one end of the chain by using a jump ring. Secure jump ring by using pliers to close the opening.

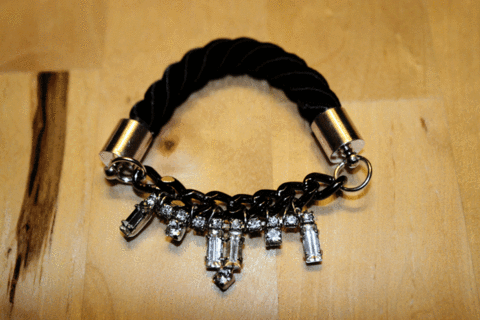
Repeat by folding the other rope end to the other end of the chain.

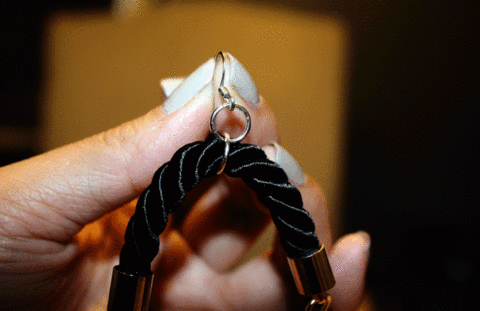
Now attach an earring hook by using two jump rings illustrated by the picture below.

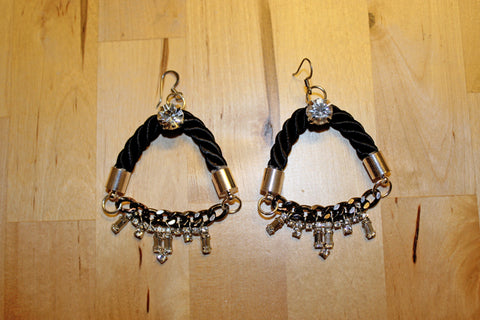
I decided to affix a large rhinestone in the center with Jewel-it glue and there you have it! A pair of stunning, stylish rope earrings!

I hope you get the chance to try these out! Be a little creative and try out different coloured ropes and materials!

Connect with Me!
Facebook   Twitter   Pinterest   Instagram   Bloglovin
0 comment
0
Facebook Twitter Google + Pinterest
Natalie Ho

Hi, I'm Natalie! Thanks for stopping by my DIY and Lifestyle blog. I hope you find many inspirations and ideas to elevate your daily life!

previous post
Style Eh? Garage Clothing
next post
DIY {Holiday Gift Guide} :: Statement Necklace

You may also like

DIY Inspiration :: 5 Ways to Update Your...

2013.01.07

DIY :: Rhinestone Strand Wrap Watch

2013.01.30

DIY :: Hand Painted Holiday Plates and Mugs...

2016.12.20

DIY :: Mini Succulent Planters

2016.03.23

DIY {Holiday Gift Guide} :: Statement Necklace

2012.11.20

DIY :: Marble {slab} Vanity Tray

2014.02.26

DIY (and giveaway) :: Outdoor Planter {with President’s...

2014.06.06

DIY :: Halloween Costumes (and a GIVEAWAY)

2013.10.29

DIY :: Joe Fresh Fur Trimmed Infinity Scarf...

2014.11.21

DIY :: Growing and Freezing Fresh Herbs

2016.07.05

DIY :: Summer Tea Parties with Alokozay Tea

2015.05.16

DIY :: Matching Cropped Top and Skirt

2013.07.25

Leave a Comment Cancel Reply

This site uses Akismet to reduce spam. Learn how your comment data is processed.

Search

Connect

Facebook Twitter Instagram Pinterest Email

About Me

About Me

Hi, I'm Natalie!

Thanks for stopping by my DIY and Lifestyle blog. I hope you find many inspirations and ideas to elevate your daily life!

Subscribe

On Pinterest

@mlsecrets

Recent Posts

  • Motherhood: Easy and Educational Toddler Meal in Minutes with Chef Boyardee ABC 123

    2021.12.30
  • Home & Decor :: 4 Easy Halloween Home Decorations with your Cricut

    2021.10.28
  • Motherhood: Best Toddler Books Under $20

    2021.04.16
  • Home & Decor :: Before & After – A Living Room Transformation with Urban Barn

    2021.04.01
  • Motherhood: Must-Haves to Combat Toddler Cold and Flu Season

    2021.01.28
Close

PSST, Hey There!

Subscribe and receive all of my little secrets in your inbox.

Latest posts on Instagram

No images found!
Try some other hashtag or username
  • Facebook
  • Twitter
  • Instagram
  • Pinterest
  • Email
Footer Logo

Copyright © my little secrets


Back To Top